Showing posts with label GARDEN. Show all posts

Sunday, 20 June 2021

Patio Pergola

Now that the bar is installed, we decided to go with a two tone colour stain on the Pergola from Lowes - Olympic Maximum stain in Ebony and Cedar Natural Tone.  I love it!

We repurposed the 2x6's from the carport formally on this spot and made this outdoor sectional

Thanks Sean for helping me stain all morning! 
I think the black helps define the area more instead of blending into the fence.  We have two shade screens since me and the babies are so freaking pale
Here is the before when it was a carport and Sean's hard work  
 
Sean removed the carport himself.  The roof line was so steep that 4' of the carport/covered patio was unusable
A contractor put in the cement slab, fence and posts
 This was all guess work for Sean, he is NOT a contractor.
Not bad for an IT guy.
 Our pallet coffee table LOL.  I was so over the moon when Sean bought me the fire-table for Mothers Day 2020.  Really improved all our staycations
Corrugated roof going in
The finished product before staining
Sean finally caved and built a bar.  Secondhand stools from Kijiji - $40


Sunday, 23 September 2018

Patio Delays

Sean worked like a dog in the hot sun on Saturday last week removing the yellow cedar and 3 Yucca's in the front of our house so that our Contractor could dig the footings for the new porch this past week.  Of course the porch didn't end up happening and the concrete guy had to delay the pour for the patio.  However our fence is in !!!  
Oddly enough our backyard seems bigger now that the fence is in, not smaller.

We were crazy busy yesterday moving dirt around to fill in the double deep slab removal.  We ordered 4 cubic yards, but it ended up taking 7.
The plan is to buy new edging stones in the Spring to finish off the re-directed Hosta Garden.

We are throwing down grass seed after the new patio slab is pored, hopefully this week.  Crossing our fingers the grass takes a bit before the frost ???
Bye bye wacky neighbour lady !!!  Above is our view of her now :)

Friday, 5 August 2016

Upcycled Stair Rails / Spindles

What to do when gifted a large batch of wooden stair rails / spindles?

I think practically every one knows that I am a crazy craft nut, so much so that even my neighbours are on the look out for items for me to re-purpose.  My neighbour across the road is a contractor and was doing a porch rebuild.  He decided to salvage the porch rails that weren't rotting and thought of me to gift them too.  Holy cow, what a win fall.


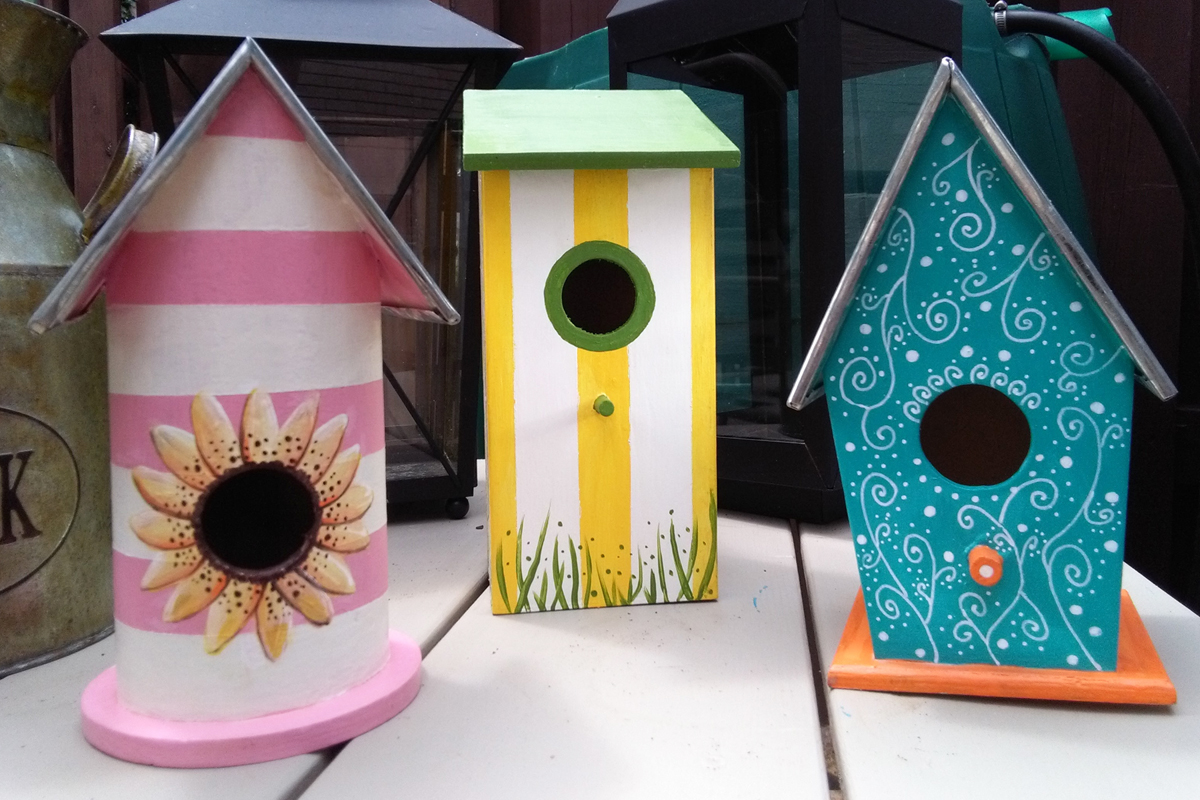
Here is what I have made so far:

After pre-cutting the tops to stagger the heights of each stair rail, I drilled pilot holes in the bottoms and inserted Dollar store dowel rods.  The dowels are to hold the rails up in the soil.  Each house is of course acrylic clear coated, so are the dowels and the bottom of the rails to protect from moisture.
The birdhouses are from the Dollar Store.  My paint job is a whimsical homage to beach huts.

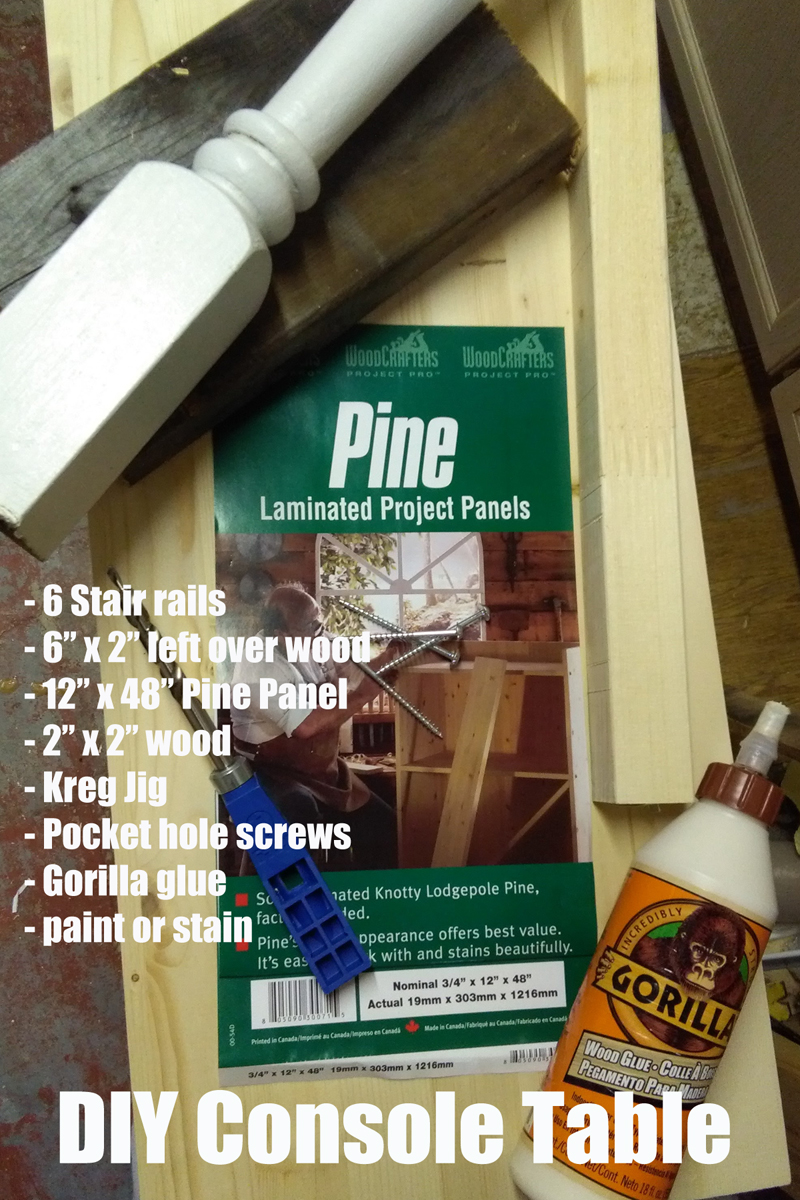
$20 Console Table

Another Spindle project the hubby and I worked on together is a console table for our hallway.
Material's:
6 stair rails
2 - 6" x 2" lumber cut to 11" long each (we used left over wood from our car port tear down)
12" x 48" pine project panel ($16.99 Homedepot.ca)
1 - 2" x 2" piece of lumber cut to 2 - 40" pieces ($2.99 Homedepot.ca)
Kreg Jig
2.5" pocket hole screws
Gorilla Glue
wood filler
paint and or stain
Assembly:
We removed 4" off each spindle so our assembled console height is 30".
Glue and screw in from the bottom each center spindle in the middle of each 11" 6 x 2.
Glue and screw each additional spindle in place.
Add the 40" skirting piece to the top of the spindle.  
We used the Kreg Jig to make pocket holes to attach these pieces.
Placing the table top surface on the floor, we marked out where the frame would be attached on the under side than flipped the project back over and drilled from the table top side down.

I have more projects planned, stay tuned.

Other Ideas Available on the Web:

Here are some of the cool upcycled possibilities using stair rails found on the web.  Any rails would work for most of these project, many are done using spindles from chairs or head boards. I think I want to do all of them.
Our Southern Home - beverage station (I so want to do this project)
Pinterest - Snowmen (I cannot find the originator of this image, only Pinterest links)
Follow Your Heart Woodworking - North Pole Decoration
Something Wonderful - Teacup bird feeders
My Re-purposed Life - Candle holders
HGTV - Coat Rack
My Love 2 Create - porch planter
DIY Show Off - Wooden Welcome Post
Lucy Desings - Dragon Flies & Butterflies
Pinterest - More ideas that have been pinned

Monday, 20 June 2016

Upcycled Gardening Upcycled Shutters

Refurbished, Re-purposed, Recycled or Upcycled - Whatever, just do it!

I had my eye out for a pair of old shutters for my garden.  We found these louvered closet doors at our local flea market for $10.00 each,  well plus $5.00 for admission, so $25.00. Sadly I knocked over the shutters and crushed the large beautiful Fern trying to get the shutters in place, leaving a big gap in the middle of the garden *sigh*  I think I may shabby chic paint these shutters turquoise.

I originally thought I would use brightly coloured pots for the herbs, but decided I want to bring the herbs in for the winter.  White pots would go better with my kitchen.  HOWEVER, these cute BYGEL plastic pots from IKEA are only 99 cents each, so it's okay to change my mind later on.  The hooks are built right in and easily slide into the louvered panels.  The potted herbs were the most expensive item in this project.

Wednesday, 8 June 2016

Bricks

Pathways to Green -  click on image to read more

Another great green project - these bricks were weeks away from ending up in a dumpster. Timing was on our side.
Googling gives me waaaaaaaaaaaaaaaaay too many ideas.  Last summer I came across all kinds of photos of rustic garden pathways made of reclaimed bricks.  I also fell in love with a brick garden edging plan.  I had to get my hands on some free bricks. 

When I asked the hubby where we could find some rustic bricks for our own path, he remembered the redundant "masonry" room in his building.  Many years back, he volunteered to move his office to the old Tech high school when the Board Office became over crowded.  Now it's become trendy to move to this building, more and more rooms are being re-purposed and the "masonry" room was slated to be revamped for yet another office space.  The bricks were going to end up in the skip!
The hubby brought home car load of after car load of bricks and we managed to use almost every single one.  Just two remain.  With the brick edging, the wheels of the mower can glide over the bricks ensuring all the edges are clipped. Admittedly, I didn't help at all with the edging, that was all the hubby, but we did work together this past wet and rainy Sunday to put in pathway together.

I'm hoping the Hens and Chicks border fills in quickly.  I'm thinking maybe 3 summer's. I planted 4 different kind.

 My Hosta garden, it's so lovely now that it's matured.
The Hosta's at night.
Here's the peonies before the rain battered them.