Showing posts with label TECHNIQUES. Show all posts

Monday, 11 December 2017

Faux Metalic Letter - Click image to read whole post

I wanted to get my hubby a metallic riveted alphabet letter for his man cave, similar to the one from my son's room, but couldn't find one.
What's a girl to do? Maker her own!
I bought a canvas letter form from Michael's using my 40% off coupon and bought a bottle of silver craft paint.  Everything else I already had on hand.
  • Craft alphabet letter form
  • Silver craft paint
  • Burnt umber craft paint
  • Pearl stickers (metal push brads would work too)
  • Craft glue (I used Ranger Glossy Accents)
1.  Glue sticker pearls in place of rivets, let dry.
2.  Paint everything silver & let dry.


3.  Using burnt umber to dirty up the silver, adding more where dirt and rust are most likely to collect.  Using a clean wet paint brush and drag down from rivets while the burnt umber is still wet for rusty water marks/drips.


Sunday, 25 September 2016

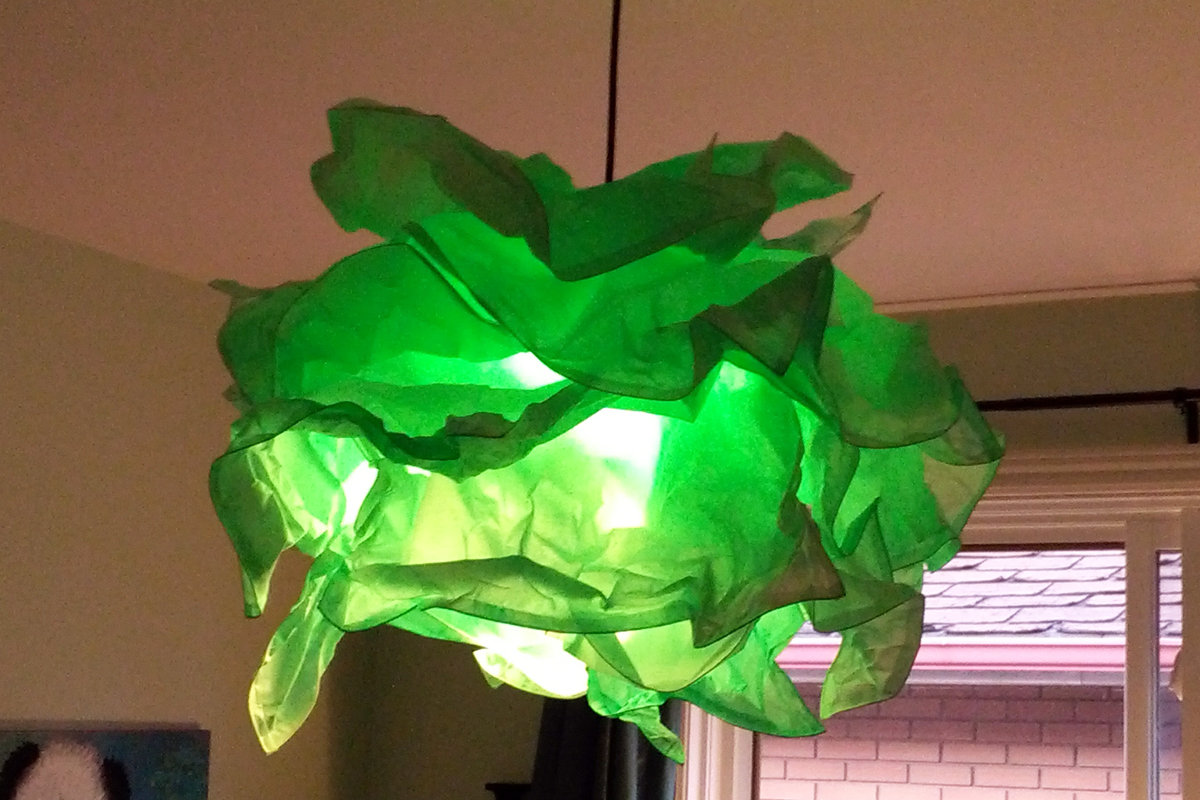
IKEA - KRUSNING Hanging Paper Lampshade

How to Dye an KRUSNING Paper Lampshade

Boo picked out a $20 Krusning hanging paper lampshade from IKEA for her room.  It only comes in a slightly off white colour.  We decided to try dying it to match her decor.
We started by disassembling the lampshade by removing the plastic circular centre ring.  A screw driver was required to pop it apart.
In a large spray bottle I mixed food colouring, acrylic paint and water until I had the right colour for the finished shade.  Hanging the individual paper sheets from a laundry line in our basement, I saturated each side of the seven paper sheets and let them air dry.  Be prepared, it does leave a mess on your basement floor.
Once dry,  we reassemble the sheets and snapped the ring back in place.  Following the assembly directions that came with the lampshade and we now a beautiful have a cute colour matched lampshade.
Sean says it make the bedroom feel like an underwater Grotto at night.

Friday, 19 August 2016

Painted Panda Canvas

Mom and Daughter Art Project

Boo and I were inspired by some canvas art for sale at our local Homesense (similar to Homegoods in the US).
Boo's favourite animals are Giant Panda, so we had to use our local Zoo's panda cubs. We used an image of 9 month old Jia PanPan and Jia YueYue.  Their names translate to Canadian Hope and Canadian Joy.

Here is our tutorial:

In Photoshop I removed the background from the origianl Panda cub image.  The image is from an online media website.

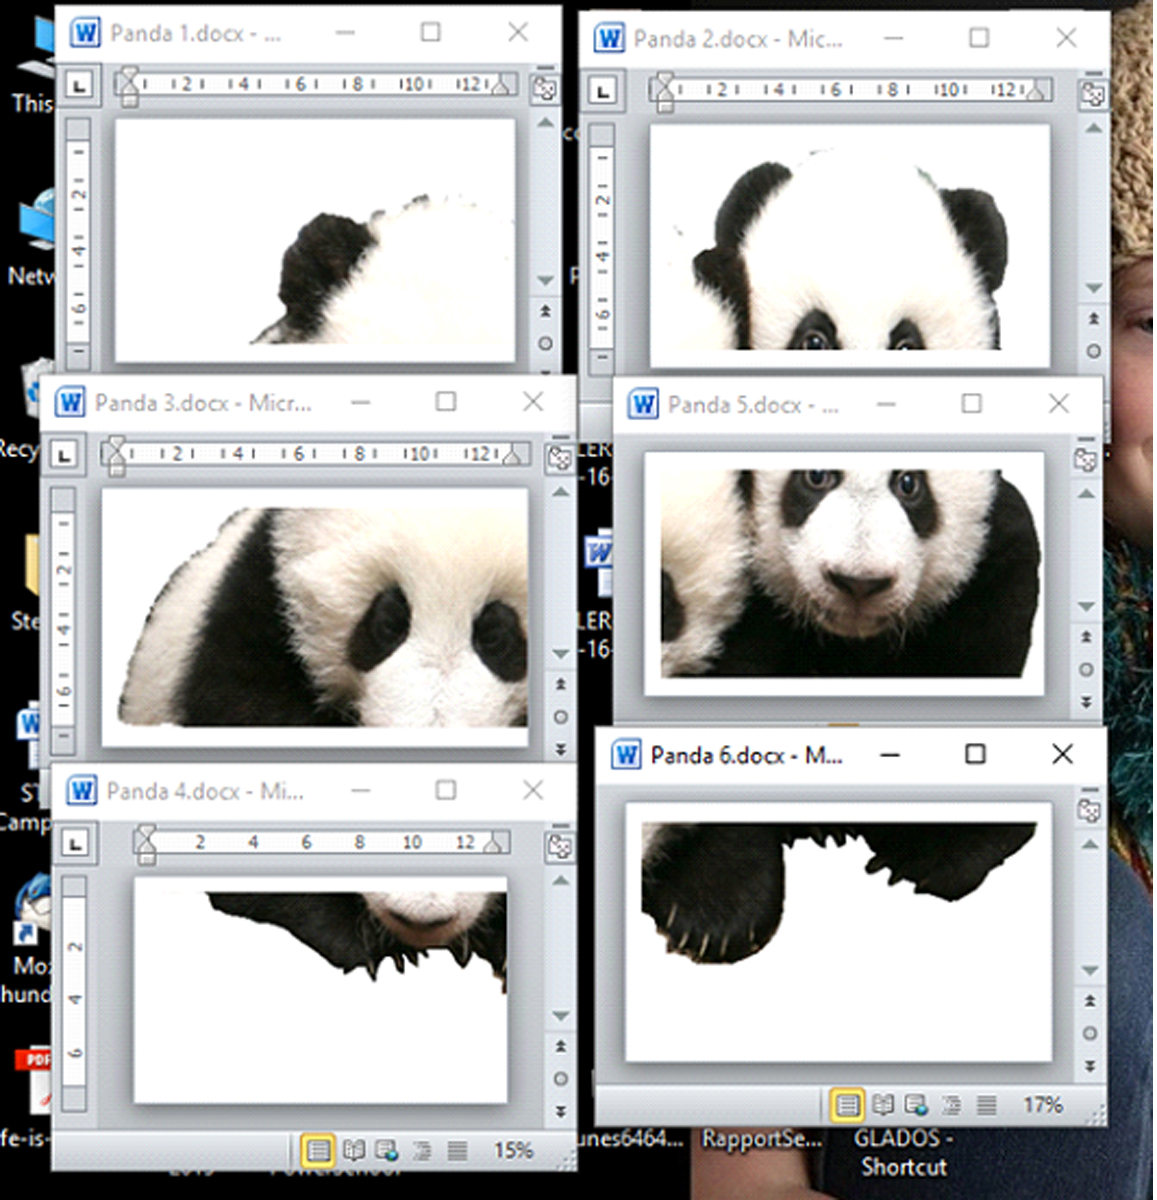
Below is our first printed attempt.  The image wasn't large enough on 3 sheets so I cropped them into 6 sheets of legal size paper instead. 
Printing Instructions:
I inserted the image into MS Word choosing "legal" paper size in the Page Layout tab and landscape orientation. I re-sized and cropped the image allowing for some image overlap and saved it into 6 files.  Then printed each segment onto legal paper on a black and white laser printer.
Using scissors we trimmed the printed panda sheets, matched up the segments then taped it together on the back side using minimal amounts of masking tape.  

3 sheets of patterned scrapbook paper fit perfectly across the canvas allowing for a bit of overlap.  

To prevent the scrapbook paper colour accidnetly bleeding through the panda image once glued, we traced then cut out the panda outline on the scrapbook paper before gluing it onto the canvas.  We used Mod Podge adhesive (Tip: less paper curling happens if the Mod Podge is added to the canvas not the paper - once dry the bubbles will recess.)
We did not add Mod Podge overtop of the glued and dried Panda image as per the Mod Podge instructions.  Instead we painted a layer of Liquitex Clear Gesso to seal and add structural integrity to the laser printed paper.  

We also added some additional scrapbook remnants to make the cubs look as if they are leaning over the painted Magnta banner.
Start painting in layers working from the outside of the body inward.  The paint stroke direction is the opposite, from the body outward. 

Feather Stroke: lighten up on the brush pressure in an outward motion, the paint stroke will strart thicker and 

Let each layer dry before moving on the next layer or colour in the gradiation. Overlap each layer slightly using a feathering stroke (lighten up on the brush pressure in an outward motion).
Panda Close Up
The bamboo image is from The Craft Chop - tree frame that I cropped in Sure Cuts A Lot.

Thursday, 24 December 2015

Getting Organized

While perusing the Internet for some DIY Kitchen organizing tips, I came across this post from Kevin & Amanda.com, on how to make your own wood drawer dividers.  

I've been looking at different dividers and bins from various Kitchen supply stores and the prices were just going to be too much.  I couldn't wait to try out this project after finding the post.  I bought 12 pieces of lumber.  At just over $25 Canadian - what a bargain for completely custom fit organization.
I used 1/4 inch thick "hobby board" made of poplar from Home Depot.  They were just over $2.00 CAD a piece.  It took approximately 3 boards per drawer - I've only completed 2 so far, so that's a guesstimate.

Here is what you'll need (no husband required):
I covered the bottom of the drawer with parchment paper, or you can use newspaper, just to protect it from glue drips.
I laid out my utensils how I wanted, measured and cut the pieces to fit.  I glued the dividers together, but not to the drawer walls.  I want to be able to remove these later if necessary. Or to add drawer liner later on.
You could be really exact and make a a box frame around the inside of the drawer before adding the dividers, that would require extra wood - I am El Cheapo. 
I chose to add just the dividers.  I did have to add some end pieces to stabilize it so the
whole thing wouldn't slide or shift over time.

Tuesday, 3 November 2015

Boo's Art Project

For some time now, my daughter and I have been thinking of making Abstract art on canvas.  We had some smaller canvases donated by Nana, but were  waiting for large ones to go on sale at Michael's.

Here's Boo's project.  We first watched some Youtube videos about Fluid Liquid acrylic painting. (example: here.)

Hannah sprayed the paints with a water bottle while they were still wet to create this effect. She used regular craft acrylic paint.


The photos don't do it justice.  When you turn it over it resembles a birch forest in front of a lake.


The squares were done with Medium Gesso and a repeating square stencil that was left to dry for 24 hours before adding paint.


Friday, 14 August 2015

Pallet Wood Pumpkins and Signage

Sorry, more pallet wood projects coming up.

I made these fun fall pumpkins - Summer 2013, but never shared them online.

I glued and nailed together strips of pallet the used a hand held jigsaw to cut a rough pumping shape.  Sand, paint, nail to a base and away you go. 


I cut the pumpkin stems from separate wood and glued onto my pumpkins, but have since seen online where they are part of the same pallet formed with the jigsaw.  If I make more of these I would follow that method, my stems keep breaking off.


I need to redo the bases with heavier wood too so they can with stand the wind in the fall.

And paint splatter in brown green cream and white, really made the pumpkin skin texture pop.

Adding spiders and faux spider webbing makes these guys last into Halloween too.
 

Thursday, 13 August 2015

October 2010 Wtich Candy Stand REPOST

This witch candy stand was originally posted on my previous blog Savory Stamping October 2010. 

Funnily enough I have now 2015 seen stuffed fabric legs at my local craft store, who knew I was a trend setter. I have seen them used on wreaths and sticking up from outdoor pots.

I saw a Trick or Treat stand at a local Fall craft fair, two years in a row. Both times I mentioned to my hubby that I could make one myself, I finally got around to it.

This is a GREAT Dollar Store project. Believe it or not it only cost me approximately $5.00 to make this Trick or Treat goody bowl stand. The majority of the parts I already had in my craft stash.


Original post found here.


The only items I purchased for this project are all from the Dollar Store: the candy bowl, the "Come In... " sign, the cat, the broom and the green craft paint. The green tutu was from my daughters dress up bin, but was originally purchased from the dollar store. She gave me permission to re-purpose this for my project.


The stand was built with 2x4's and spare wood. I had orange canvas type fabric on hand that I painted for the the boots and legs, which I then sewed together, and painted with Acrylic craft paint. 


*I wouldn't recommend making little swirly toes on the boots as I did - once sewn it was almost impossible to right side out the fabric and stuff them


The stand or base was painted black and then I made my own green crackle paint using Dollar store craft glue.  Find the crackle paint directions here from Dollar Store Crafts.com


AGAIN - This witch candy stand was originally posted on my previous blog Savory Stamping October 2010.

Wednesday, 12 August 2015

Pallet Wood Bench & Tree House

Like I mentioned in the previous post.  I have been on a bit of a Pallet Wood binge.  I will be posting some of the projects I have made over the past few years.


The bench I made in the Summer of 2013 and the bird house was last summer, although I never got around to painting it until this Spring.  
 

This bird  house has seen a few incarnations and been given away as gifts to family and friends.


I aged the wood with a vinegar and steel wool solution, demonstrated here and used left over household paint for the top planks.
 
 
I made the crackle paint with Dollar Store glue, the cheaper the glue the better, but it can't be overly water downed glue.  Find the DIY Crackle Paint directions here.  ldjfd

Tuesday, 11 August 2015

Pallet Vinagar Jar Flower Holder

This is a project from last summer ~ 2014 ~

While perusing Pinterest I came across a cool flower holder using Pallet Wood.  I was on a bit of a DIY Pallet wood manic phase.

Any way, the Pinterest item was similar in style to the one I have made, but had 3 mason jars in the wooden holder.


I age my wood using the vinegar and rusted metal technique found here.


 I thought vinegar jars would be perfect, I wanted a holder for singular flowers like daisies, although hydrangea's look amazing in them too.  The burlap and "bloom" I came up with on my own.  Truth be told, I was desperate to try an acetone transfer technique and came up with a project just to give it a try.  I filled in my letters with a marker.  Unlike the video, I used an old plastic gift card to rub the image, not a knife.


 Here is a video by madebymarzipan that demonstrates the acetone transfer technique.  Remember font needs to be printed in reverse.

FYI - you can tranfer black and white photos with this method too.

Of course you could use vinyl lettering here.  At the time of this project, I didn't have any vinyl.

Saturday, 8 August 2015

Burlap Rose Wreaths

I made myself a Fabric Rose wreath using the tutorial found on You Tube by mamt4.  Linen can be expensive at the fabric store, so I buy painter's drop clothes from Home Depot.  I once made an entire slip cover for my couch with just two packages.


Sorry for the sideways photo, apparently it's a know Blogger issue.  Didn't do it on my old site, oh well.  I was going to wrap twine around a wood cutout letter, but found some already done at Michael's for just $ 2.50 each.

Recipe:
  • grapevine wreath
  • burlap ribbon - 1 or 2 colours (the blue roses are fabric remnants from another project)
  • linen (I used drop cloth
  • pearls
  • twine covered letter (Michael's - $ 2.50)
  • hot glue
Following the same recipe I made one for my Co-worker.  The grapevine wreaths at Micheal's looked awful, they were dry, crunchy and covered in leaves, so I had to settle with a larger size then my first wreath.  I actually think I like the larger wreath better.