Monday, 27 June 2016

Hobby Lobby Goodness

For you lucky Americans, you're probably very familiar with the magnificence that is Hobby Lobby.  Being Canadian, I have never been.  When we visit relatives in the U.S we generally don't do any shopping there except on Sundays and alas, Hobby Lobby is not open on Sundays.  Although I have wistfully looked in the windows while my hubby and kids peruse the adjacent open comic book store.  This past weekend while visiting Michigan for my dad's birthday, we finally made a Saturday shopping excursion and at last beheld my desired eternal resting spot - Hobby Lobby.  

I can't believe all the amazing decor and craft items they have.  I nearly cried in the Halloween aisle, honest, ask Sean. We are definitely going back each and every time we visit.  I can't wait to see the Christmas decor, they were just starting those displays so I wasn't able to get a peek yet. Remember I cleaned out my Christmas stock last year so I need a few Hobby Lobby visits to round things out, and I have promised my dad we'll visit more often.   Tee hee, of course we will.

For you Canadians who have never Hobby Lobby'd, think Homesense & Winners meets Michael's, but bigger, much much bigger.
Anyway, I couldn't decided what to buy, I was too overwhelmed with the choice.  Fortunately one item stayed on my mind and we went back a few hours later with a 40% off coupon in hand - thanks to my stepmom.
Just love this metal birds on a wire frame.  I had planned on using it on my fence as patio decor, but decided it needed to be somewhere more prominent.
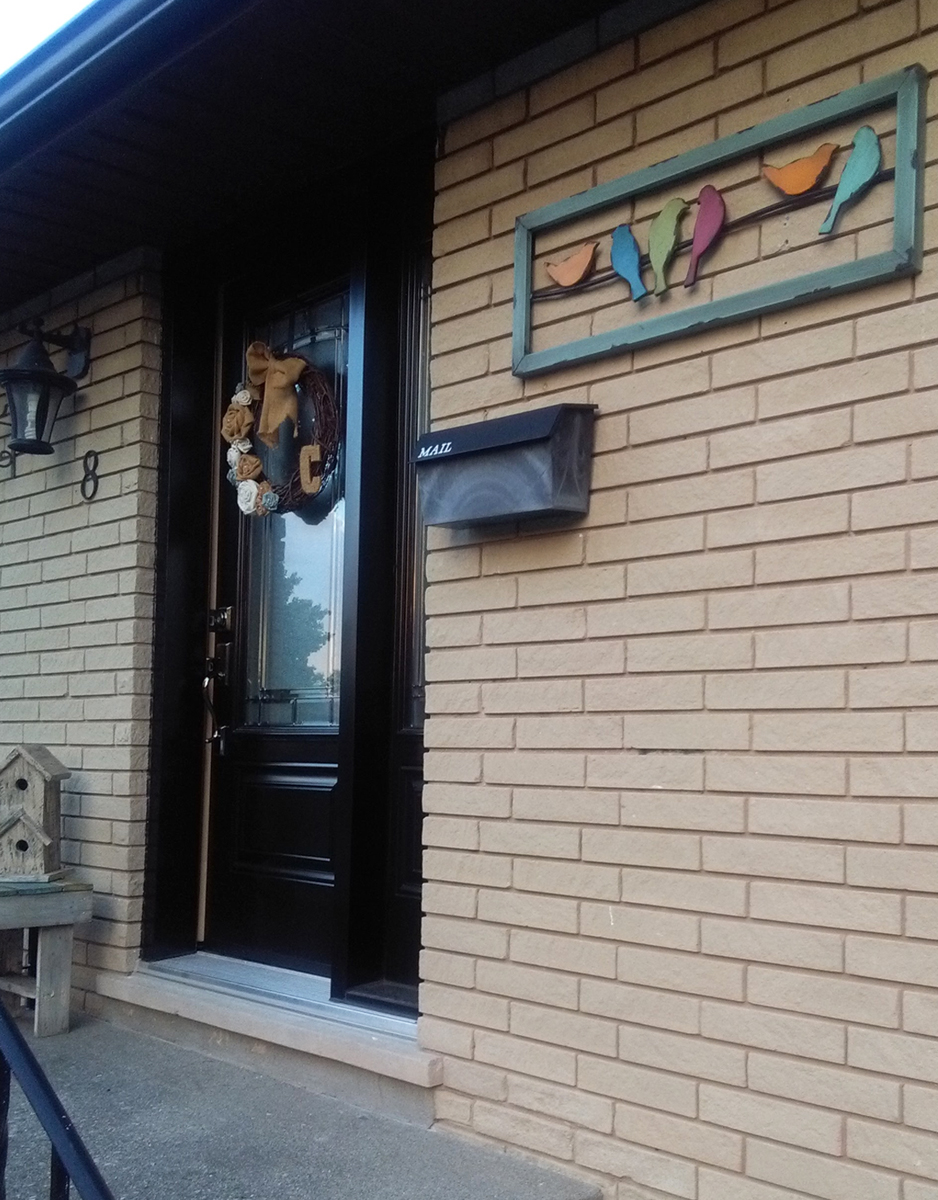
Thankfully the hubby didn't have to drill any new screw holes.  I remembered the brass brick clips from my Christmas garland project.  The key holes on the frame fit perfectly onto the clip hooks.
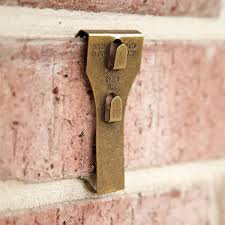
 
Borrowed clip hook images (above).  Borrowed key hole image (below)

Brick Clip Hooks - Lee Valley - carries clips for larger brick heights

Monday, 20 June 2016

Upcycled Gardening Upcycled Shutters

Refurbished, Re-purposed, Recycled or Upcycled - Whatever, just do it!

I had my eye out for a pair of old shutters for my garden.  We found these louvered closet doors at our local flea market for $10.00 each,  well plus $5.00 for admission, so $25.00. Sadly I knocked over the shutters and crushed the large beautiful Fern trying to get the shutters in place, leaving a big gap in the middle of the garden *sigh*  I think I may shabby chic paint these shutters turquoise.

I originally thought I would use brightly coloured pots for the herbs, but decided I want to bring the herbs in for the winter.  White pots would go better with my kitchen.  HOWEVER, these cute BYGEL plastic pots from IKEA are only 99 cents each, so it's okay to change my mind later on.  The hooks are built right in and easily slide into the louvered panels.  The potted herbs were the most expensive item in this project.

Wednesday, 8 June 2016

Bricks

Pathways to Green -  click on image to read more

Another great green project - these bricks were weeks away from ending up in a dumpster. Timing was on our side.
Googling gives me waaaaaaaaaaaaaaaaay too many ideas.  Last summer I came across all kinds of photos of rustic garden pathways made of reclaimed bricks.  I also fell in love with a brick garden edging plan.  I had to get my hands on some free bricks. 

When I asked the hubby where we could find some rustic bricks for our own path, he remembered the redundant "masonry" room in his building.  Many years back, he volunteered to move his office to the old Tech high school when the Board Office became over crowded.  Now it's become trendy to move to this building, more and more rooms are being re-purposed and the "masonry" room was slated to be revamped for yet another office space.  The bricks were going to end up in the skip!
The hubby brought home car load of after car load of bricks and we managed to use almost every single one.  Just two remain.  With the brick edging, the wheels of the mower can glide over the bricks ensuring all the edges are clipped. Admittedly, I didn't help at all with the edging, that was all the hubby, but we did work together this past wet and rainy Sunday to put in pathway together.

I'm hoping the Hens and Chicks border fills in quickly.  I'm thinking maybe 3 summer's. I planted 4 different kind.

 My Hosta garden, it's so lovely now that it's matured.
The Hosta's at night.
Here's the peonies before the rain battered them.

Monday, 23 May 2016

Succulent Window Frame

I used a chopped down section of pallet wood added a bottom with drilled holes for thorough drainage and added a variety of succulents.  I know that the succulents will eventually fill in, just not sure how quickly.  Thew window is the old basement bathroom window from our house that I saved from last fall when all our windows were replaced.  My hubby busted out the glass and I stapled Dollar Store chicken wire to the backside.
I stenciled "Le Jardin Heureux" the happy garden on the the front and voila, a cute lilttle window box that I hopefully can't kill.

Re-purposed Carport

Go Green.

The hubby took down our carport two summer's ago.  I had him save the 2 x 6 lumber so that we could re-purpose it into outdoor furniture.  We modified directions found on anawhite.com for platform furniture, but used 4 x 4 to raise the bench off the ground.
We even used old leftover paint from our shed to paint it.  Feels great to makes such a green project.
The cushions are from IKEA.  I haven't purchased throw pillows yet, but am thinking bright colours.  Our neighbor gave us the striped pillows and outdoor carpet.
We are in the process of making a few modular pieces to have a sectional.  I'll post photos when we are done.
I made the end tables from scarp wood we had from other projects and plan to make a few more. 

The kids enjoyed an outdoor movie with a friend while the folks hung out by the fire pit.  What a lovely way to spend the long weekend. 
Kewl tidbit about the umbrella.  We bought 2 of them from a Liquidation store for $25.00 each.  What a steal.

Friday, 20 May 2016

Wine and Canvas

Did a fun Wine and Canvas night with some friends.  We painted dragon flies.  What a fun concept these nights are.


Sunday, 8 May 2016

Happy Mothers Day

Thrift Store Teacup Succulents - see below for instructions. 

Click on image to read the full post.
To all my family and friends, I hope you had a fantastic Mother's Day.
My hubby and kids were extra wonderful to me.  Hannah took a "re-purposed" workshop with "From the Attic Interiors".  She painted me a wonderful wooden candle holder and gorgeous stencil sign.  Anderson painted a beautiful scene on a seashell and they both with the help of daddy bought me a food processor.  Hurray, black bean brownies for everyone!

As an added treat the hubby splurged and bought me cushions for our outdoor furniture sectional we built using wood from our the carport tear down. The sun hasn't cooperated today to take a photo of the furniture.  I will post them in the near future.

Here is my Mother's Day gift for the mom's in my life.  Some of you won't have them in hand until the next time I see you.  I can't wait to find more cups.

Teacup Succulents Recipe.
Difficulty Level: Easy, no husband required
  • Adhesive (E6000 craft adhesive or Silicone adhesive sealant) I didn't use any adhesive, the cup and saucer are not attached.
The masking tape helps the drill bit not slip while the hole is starting. 
For outdoor teacups, drill a hole through the cup and the saucer for drainage.  You can glue the saucer and cup together with clear silicon adhesive sealant or E6000 craft adhesive before drilling.  I opted not to glue them together.  For indoor cups, a hole in the teacup alone should be sufficient.  Succulents prefer to be dry.

Place a few small rocks at the bottom of the cup to promote drainage.  Add succulent and top with Cactus potting mix.

Here's my kids art projects for me.